Debug OpenAI APIs in NodeJS with Proxyman
This tutorial will show you how to write a simple NodeJS Server and Chat Client that calls to OpenAI API (/chat/completions) and inspect the HTTP/HTTPS traffic with Proxyman. It's useful when you want to debug what's happening behind the scene when you use OpenAI.
Here is what we achieve in this tutorial:
- Setup Proxyman macOS
- Develop a simple NodeJS Server with Express JS to make a OpenAI call
- Simple HTML Chat Client to send message to the NodeJS Server
- ✅ Capture OpenAI HTTP/HTTPS request response with Proxyman
1. Prerequisites
- Proxyman macOS (Download from Proxyman.com)OpenAI
2. Setup Proxyman
- Install Proxyman from Proxyman.com
- Open Proxyman -> Go to Certificate Menu -> Install Certificate for macOS -> Follow the steps to install the certificate
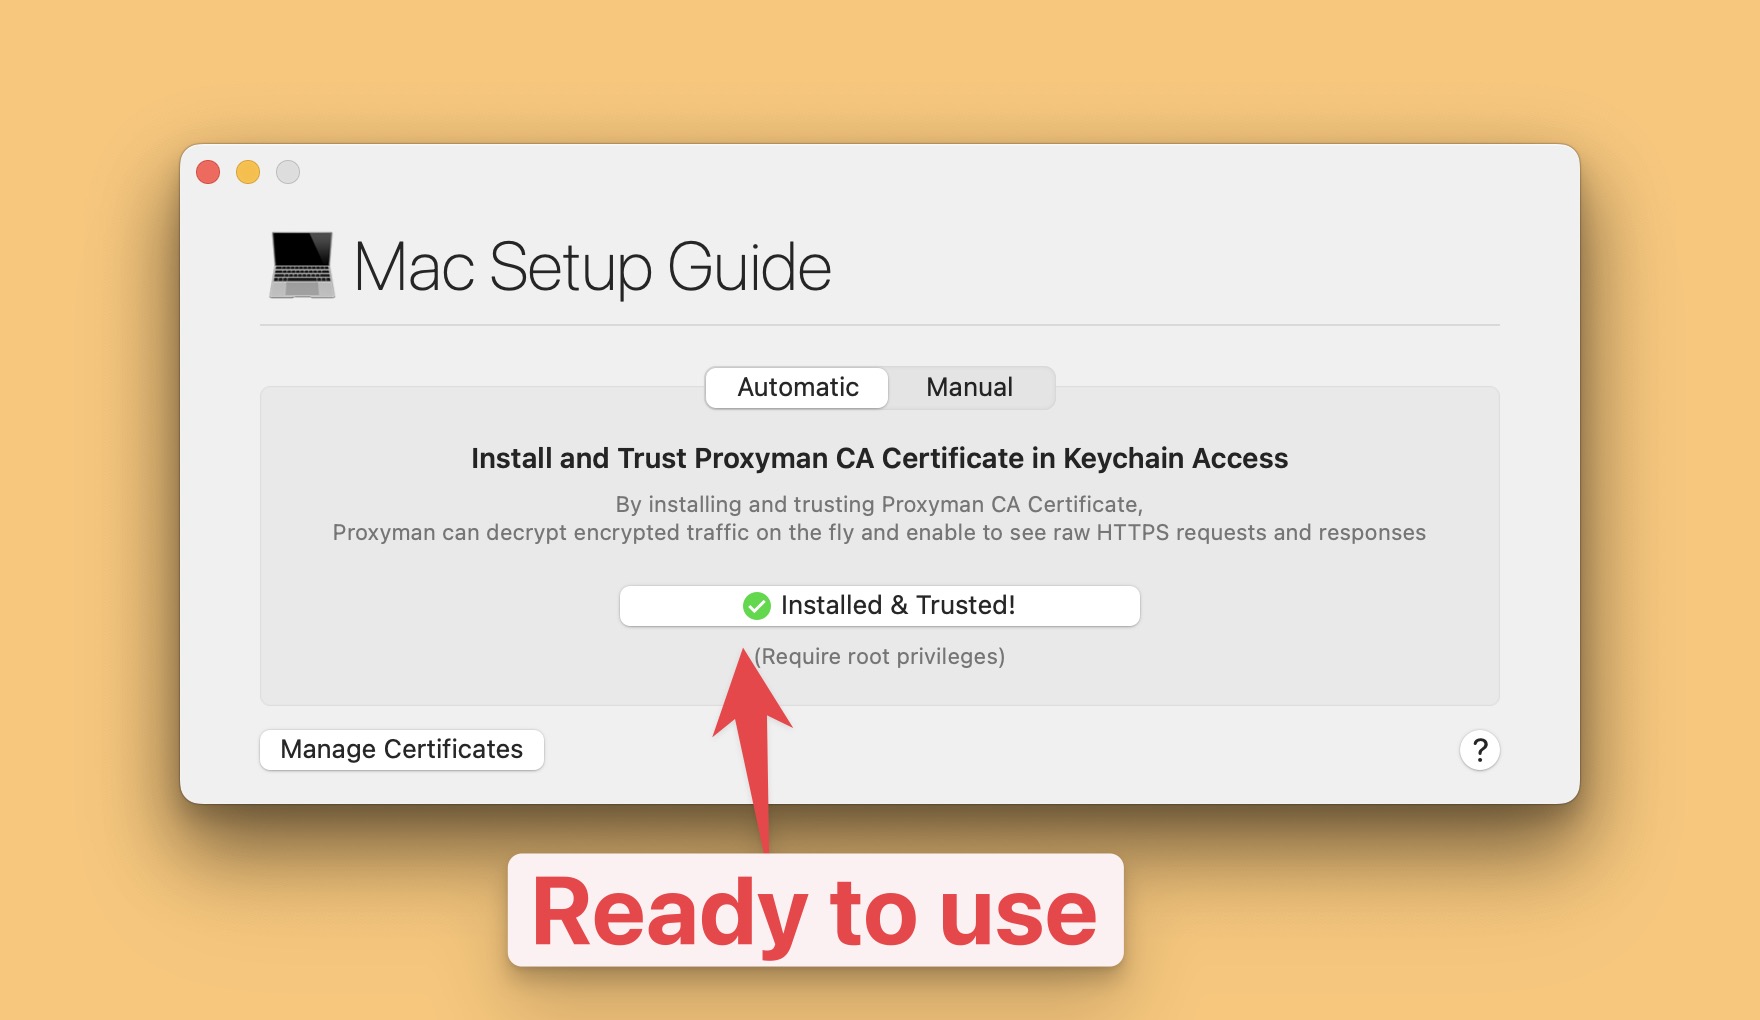
At this point, Proxyman is ready to intercept any HTTPS traffic on your macOS.
3. Start ChatGPT Sample App
We need a simple Restful Server that makes a OpenAI call to ChatGPT API.
Let's clone the source code from GitHub and run it.
git clone https://github.com/ProxymanApp/chatgpt-nodejs-app
cd https://github.com/ProxymanApp/chatgpt-nodejs-app
npm install
- Open
.envfile and update theOPENAI_API_KEYwith your own OpenAI API key. You can get it from OpenAI Dashboard
OPENAI_API_KEY=your_openai_api_key
- Start the NodeJS Server
npm run dev
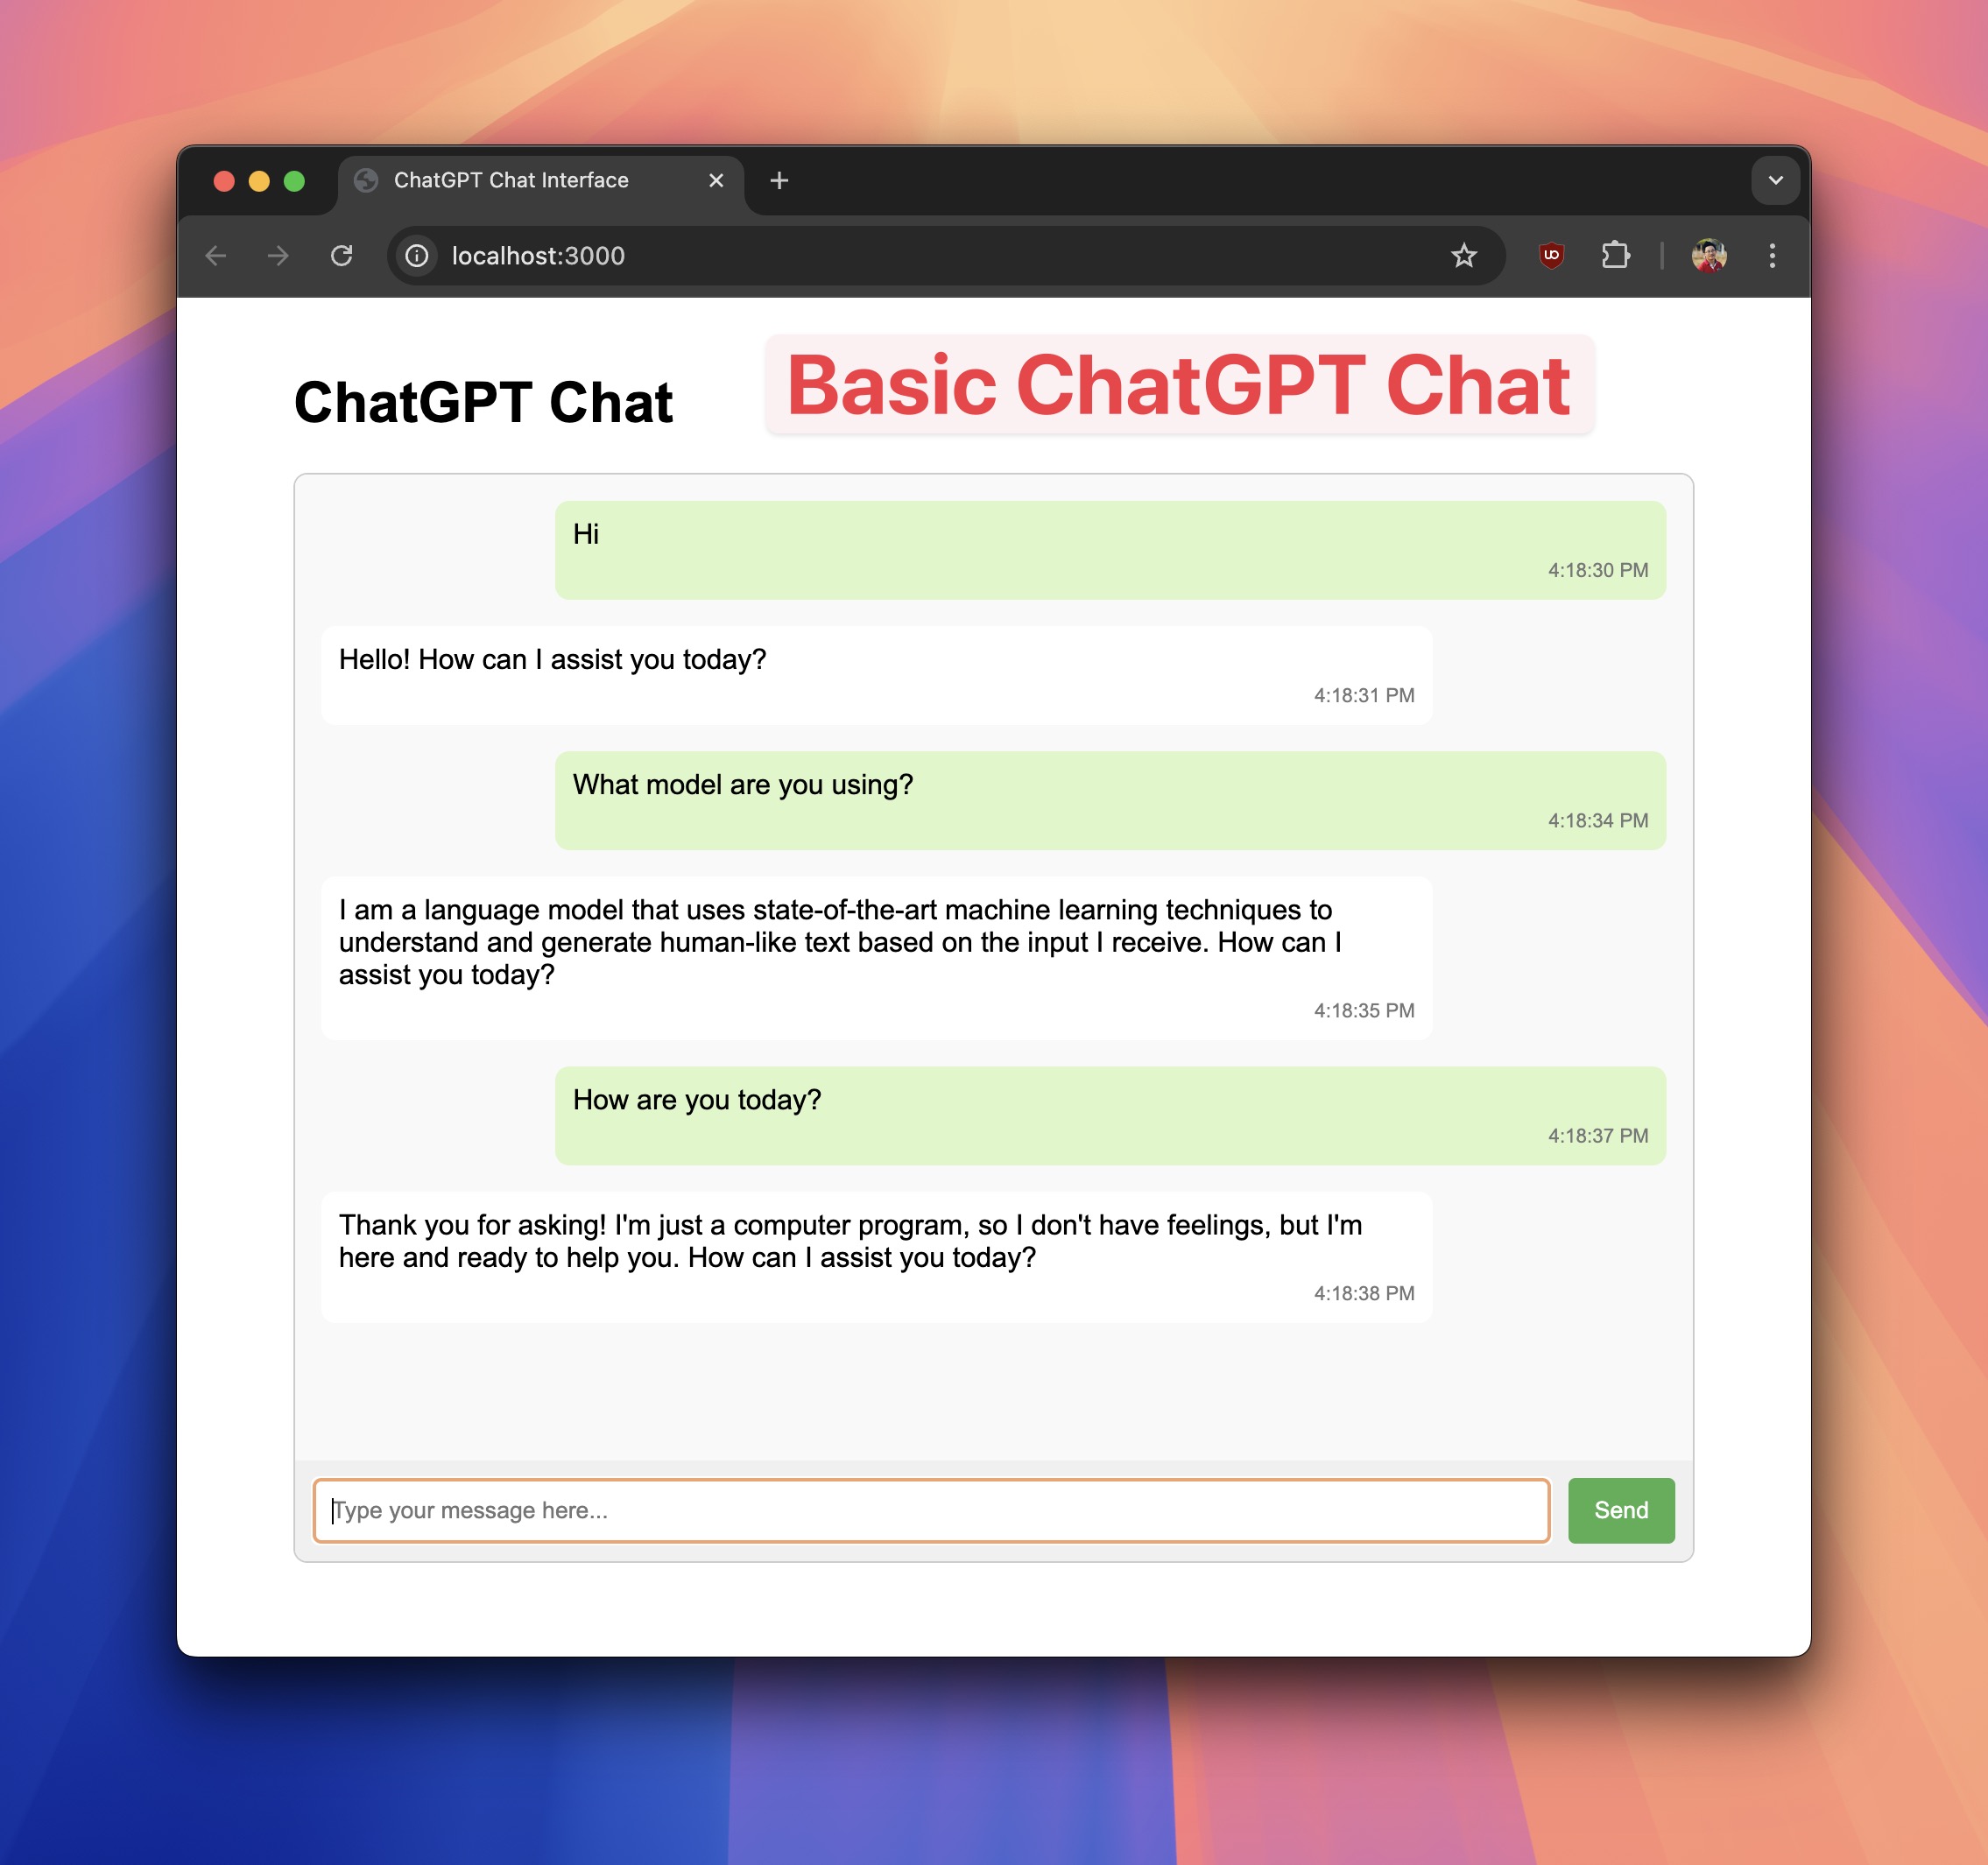
This will start the NodeJS Server on port 3000 and serve a static HTML file at http://localhost:3000.
Try to chat with GPT and see how it works.
Here is the basic diagram how it looks:

- The Chat Client will make a POST /chat request to the NodeJS Server that carry the user message
- The NodeJS Server will make a API to OpenAI:
https://api.openai.com/v1/chat/completions - The NodeJS Server will return the response to the Chat Client
- The Chat Client will display the message
The reasons why we don't make a direct API call from the Chat Client is that we want to hide the OpenAPI key from the Chat Client.
To understand the code, let's check the server.js and index.html file.
Questions
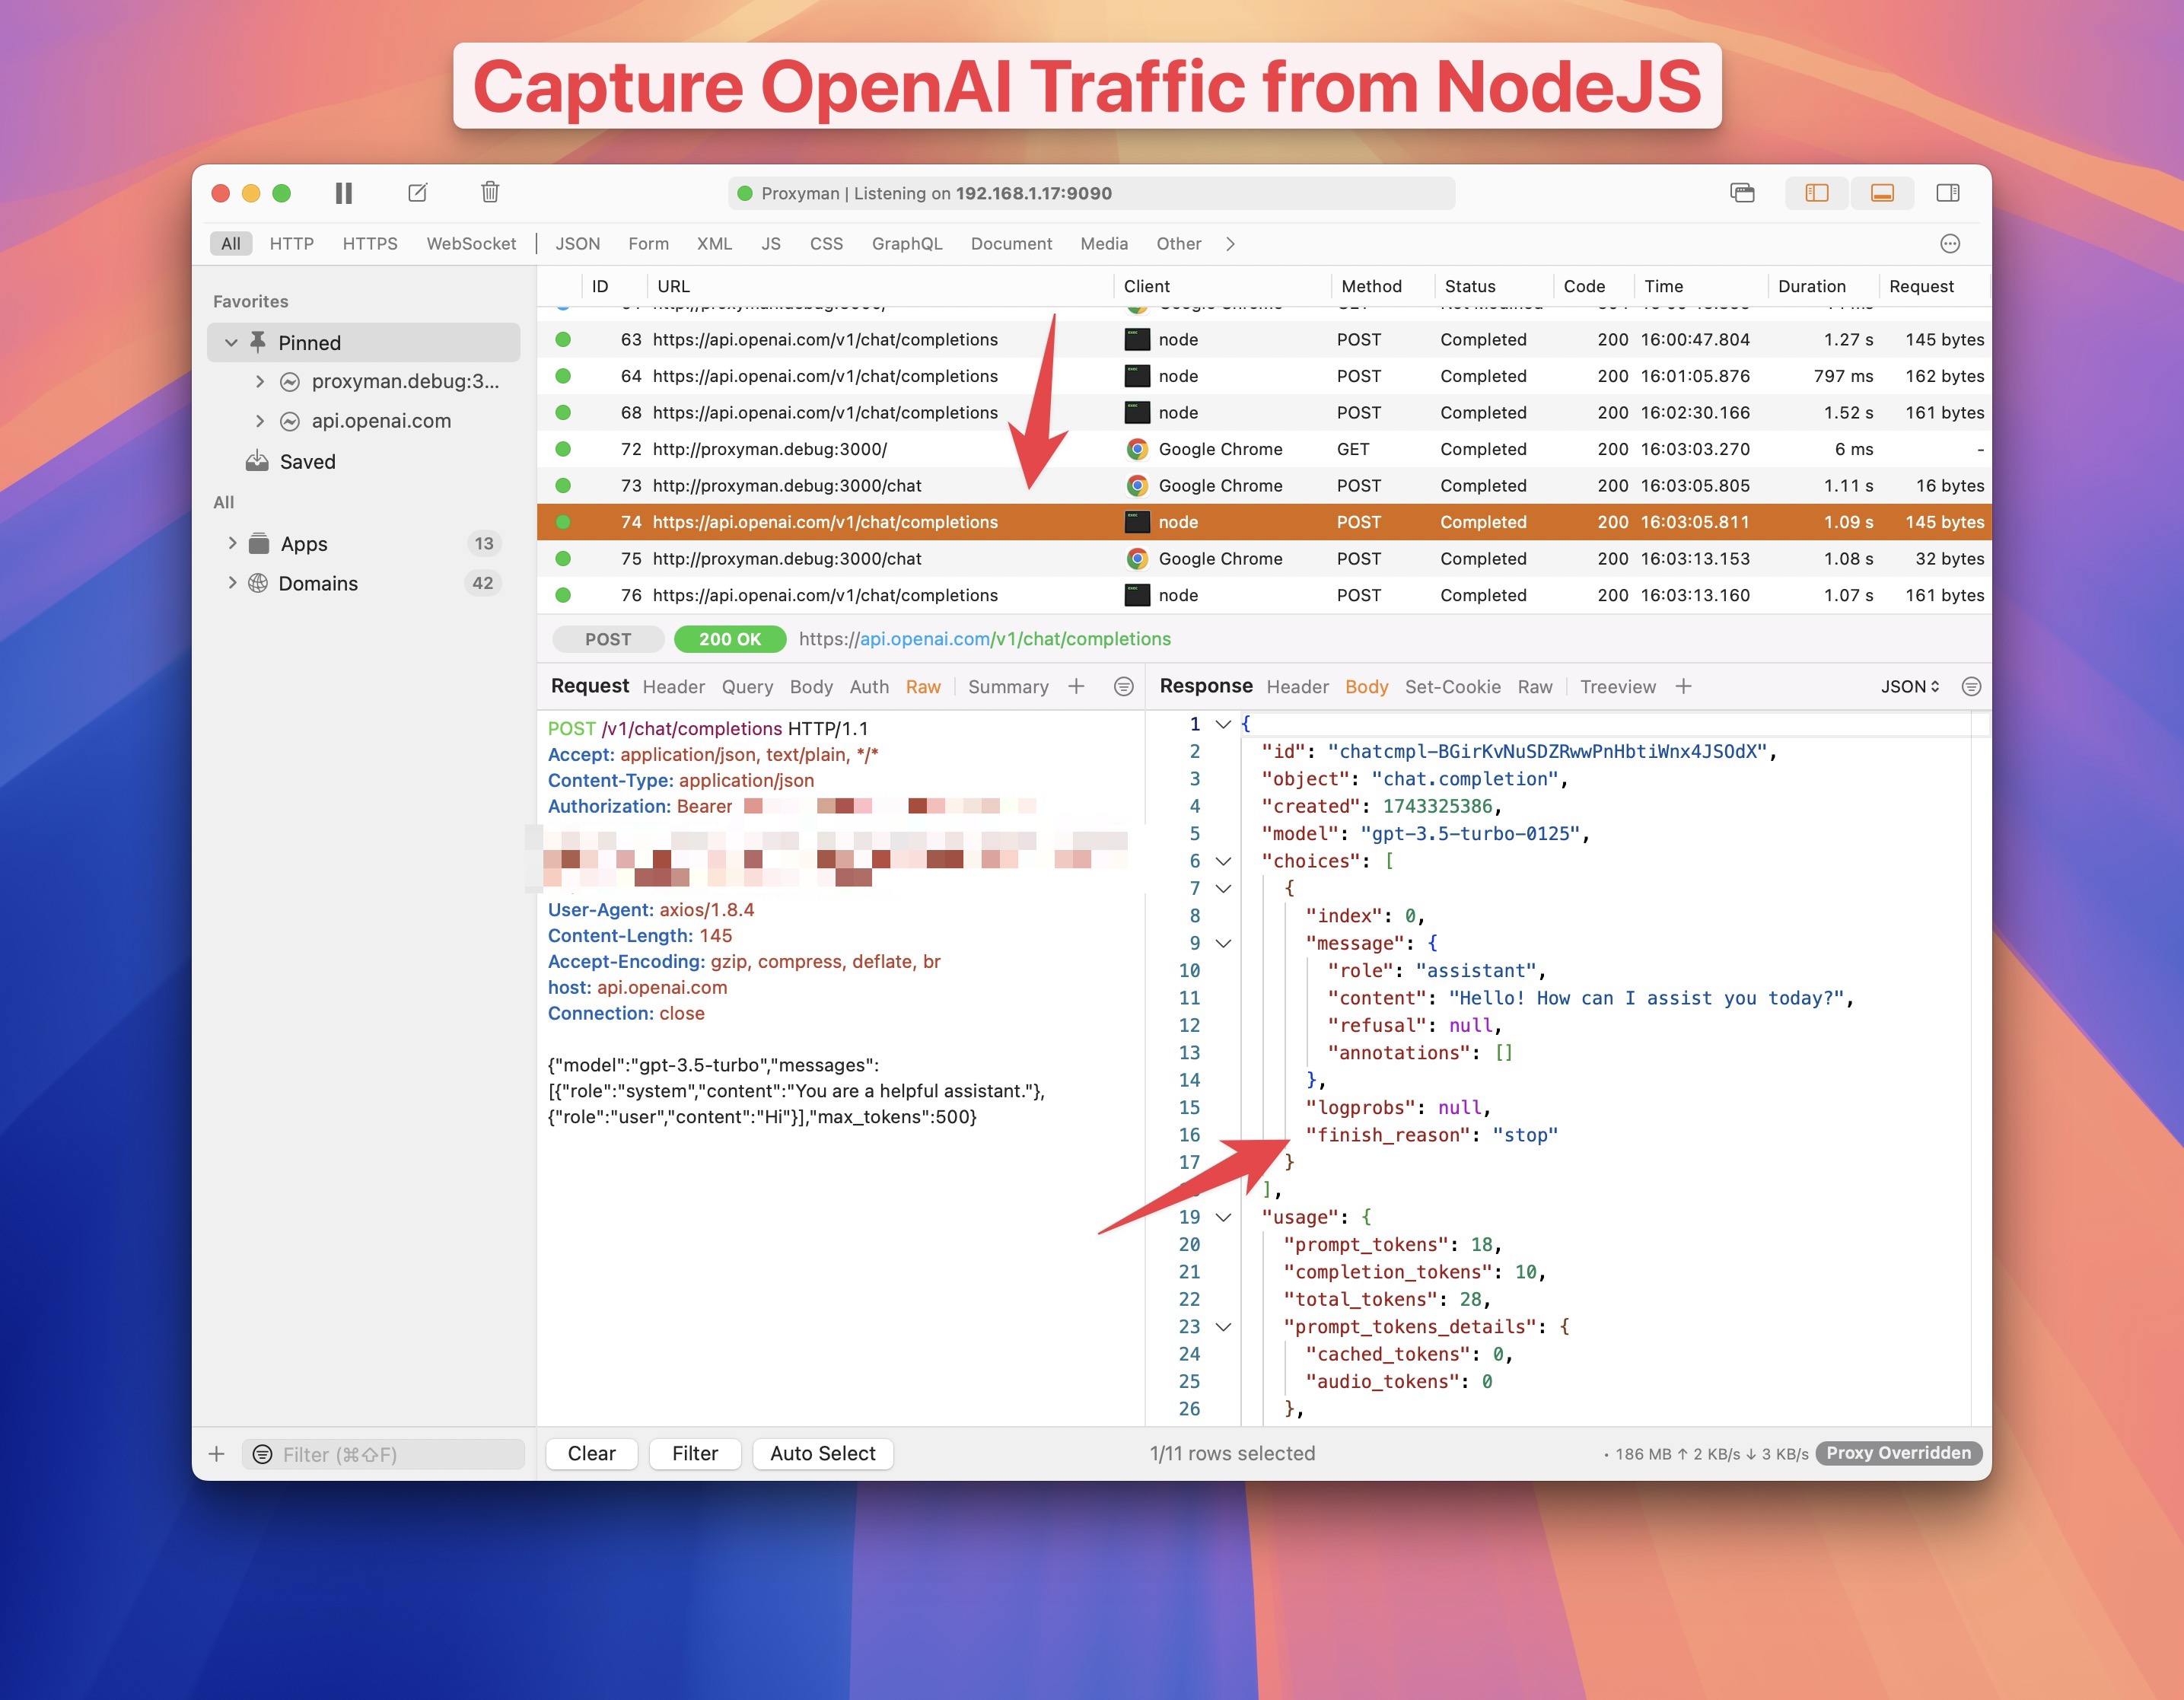
1. I want to see how NodeJS Server makes a request to OpenAI via https://api.openai.com/v1/chat/completions
Answer:
Luckily, Proxyman can capture the HTTP/HTTPS traffic from the Chat Client to the NodeJS Server with 1 click.
- Open Proxyman -> Setup Menu -> Automatic Setup -> Select your favorite Terminal (Mine is iTerm) -> Click on
Open new Terminalbutton
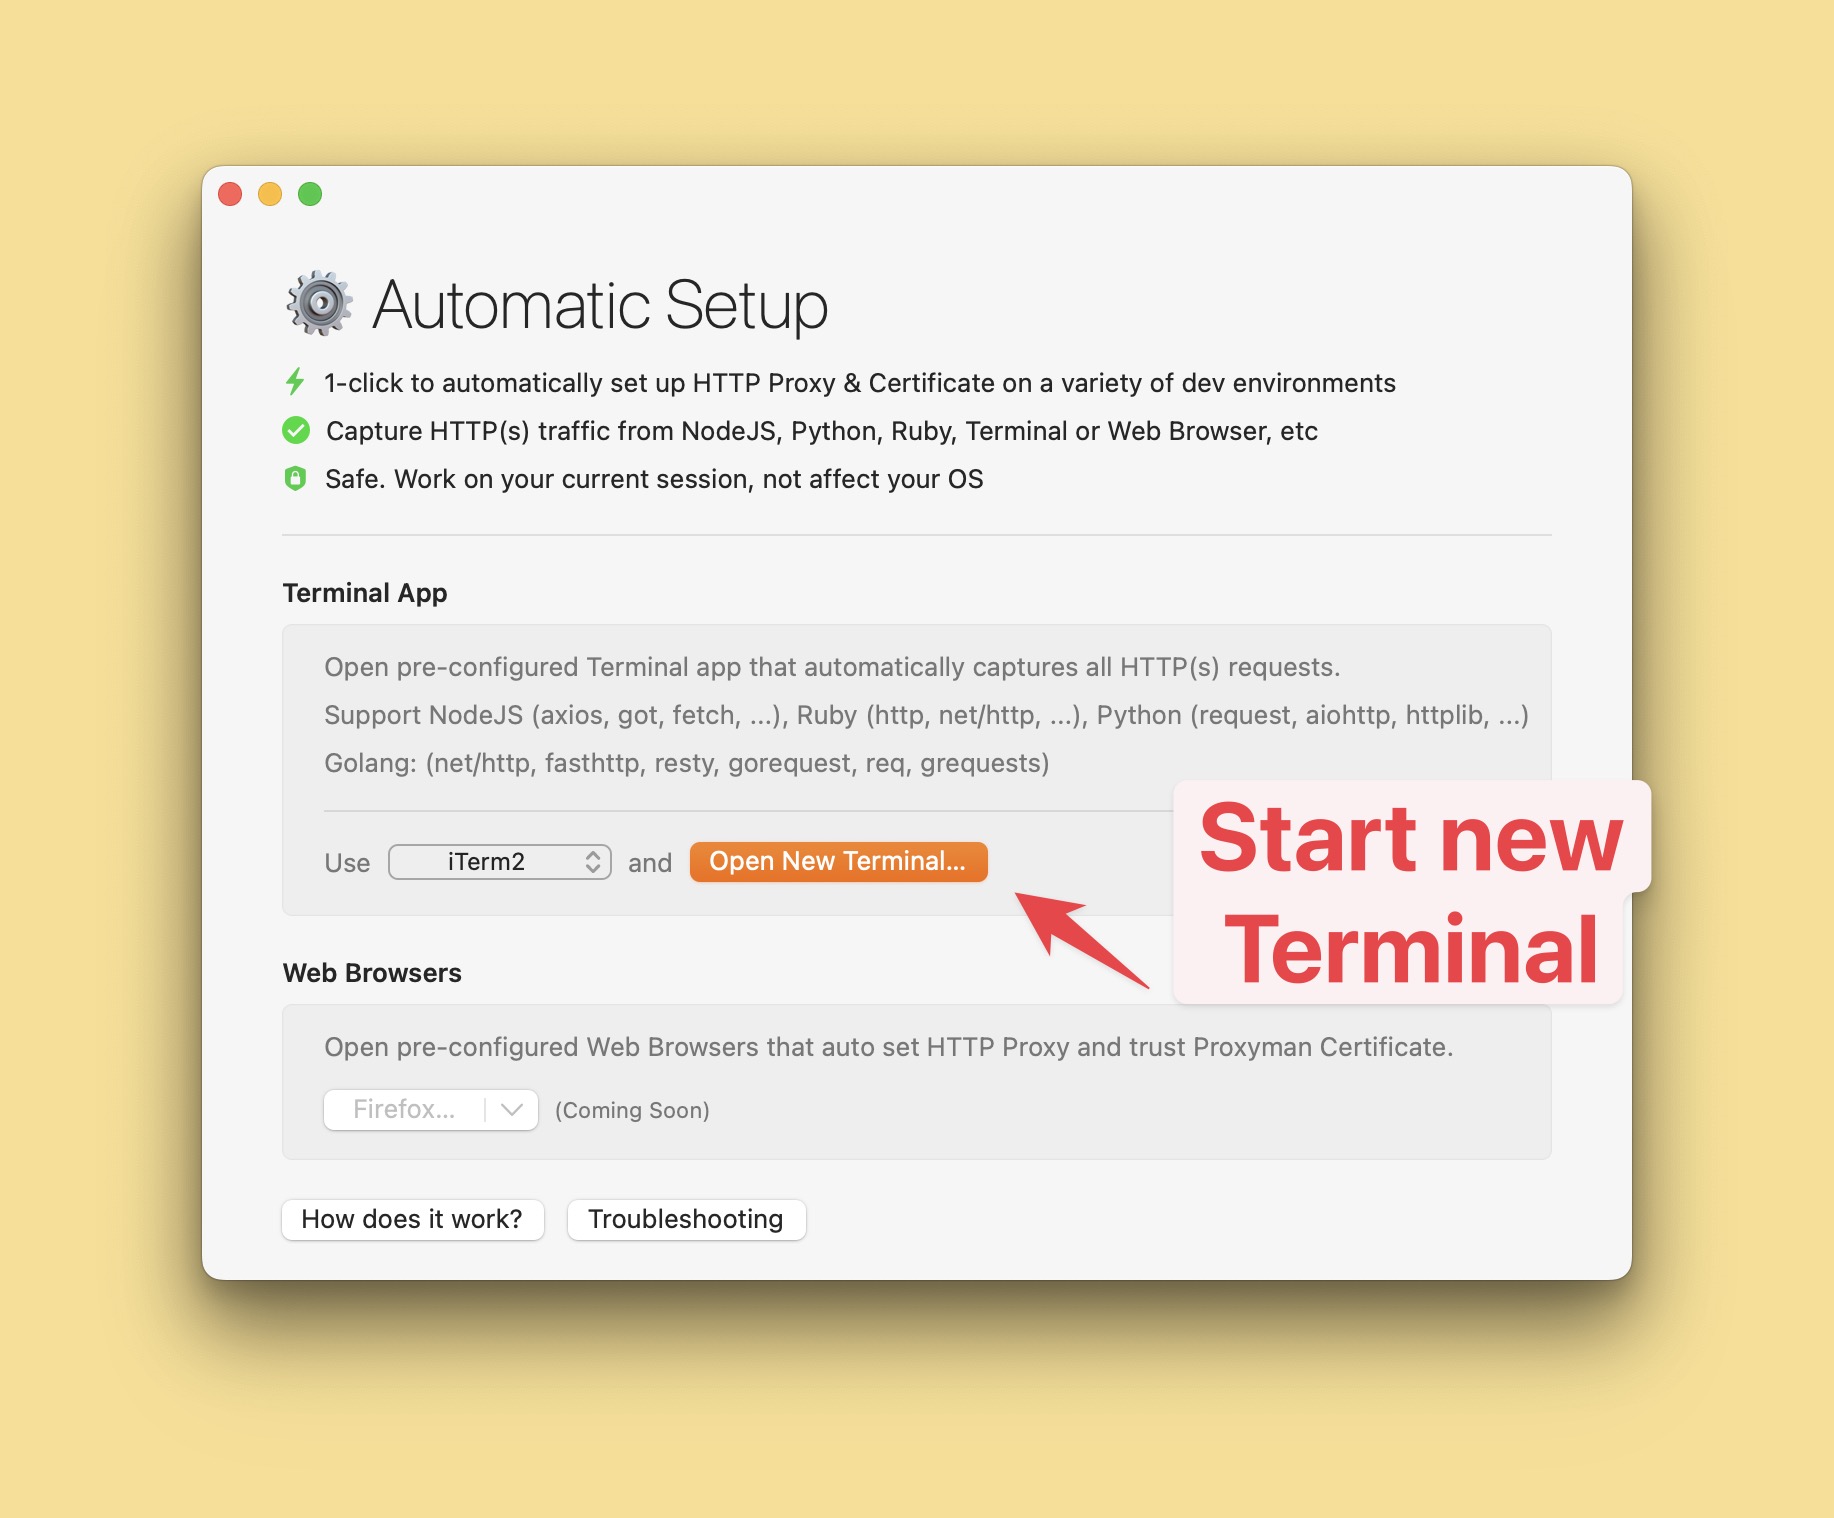
- Run the NodeJS Server on this Terminal
npm run dev
- Go back your Web Browser and visit http://localhost:3000 to open a ChatGPT Sample App
- Make a few chats with GPT and see how it works
- Back to Proxyman, you will see the HTTP/HTTPS traffic from the Chat Client to the NodeJS Server
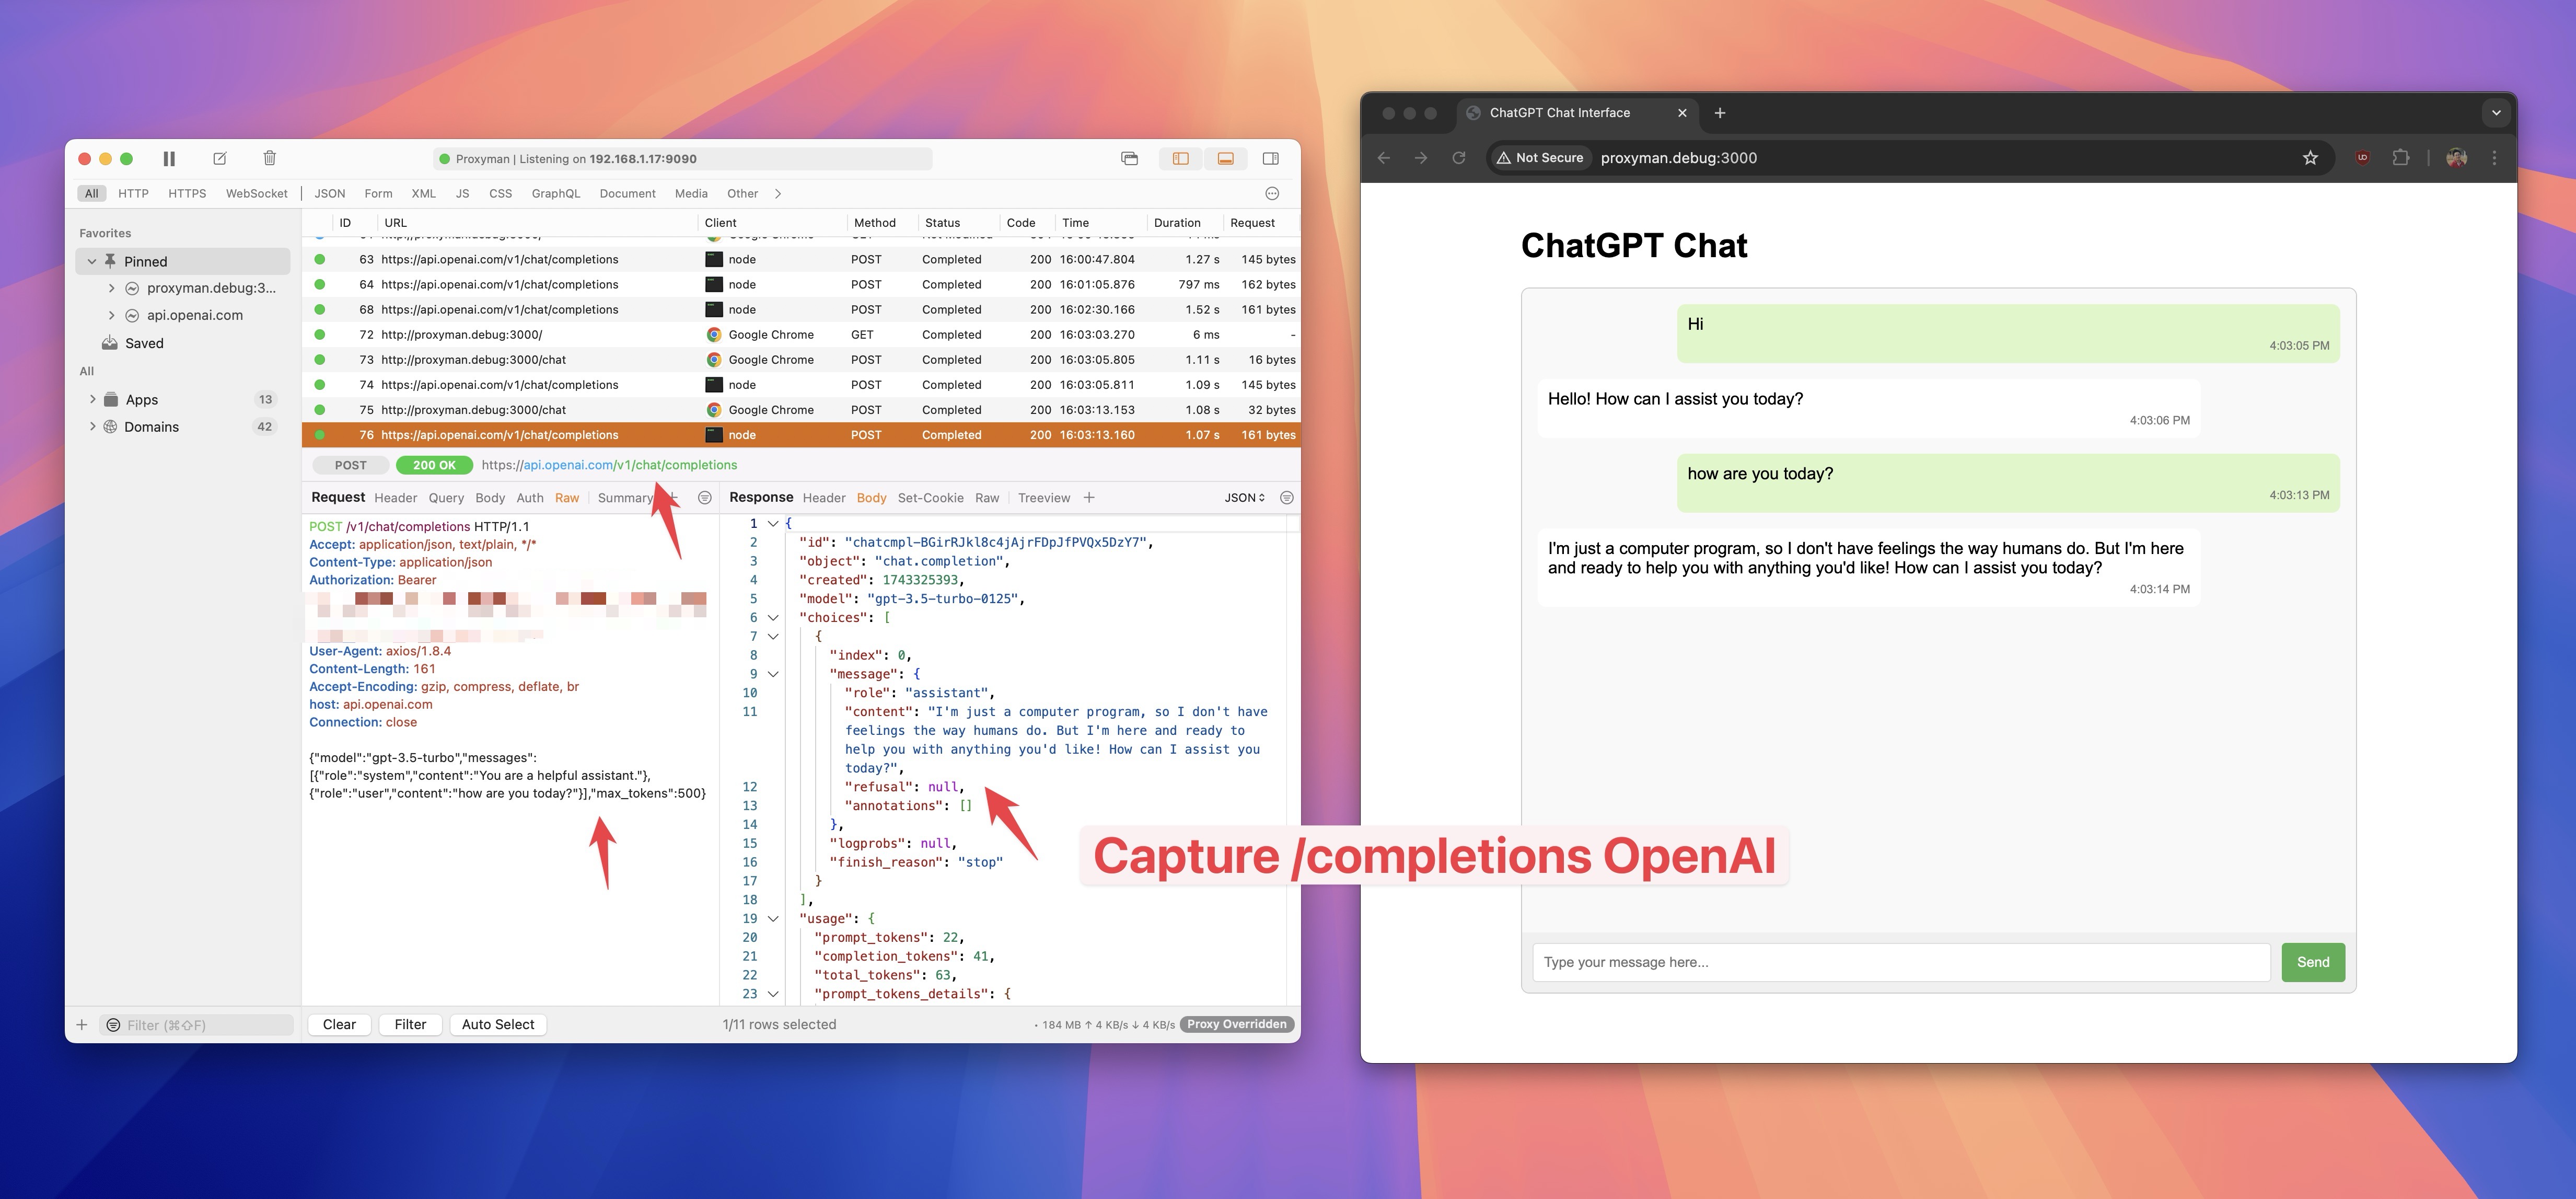
As you can see, Proxyman automatically capture the HTTP/HTTPS traffic when it's calling from NodeJS Server to OpenAI.
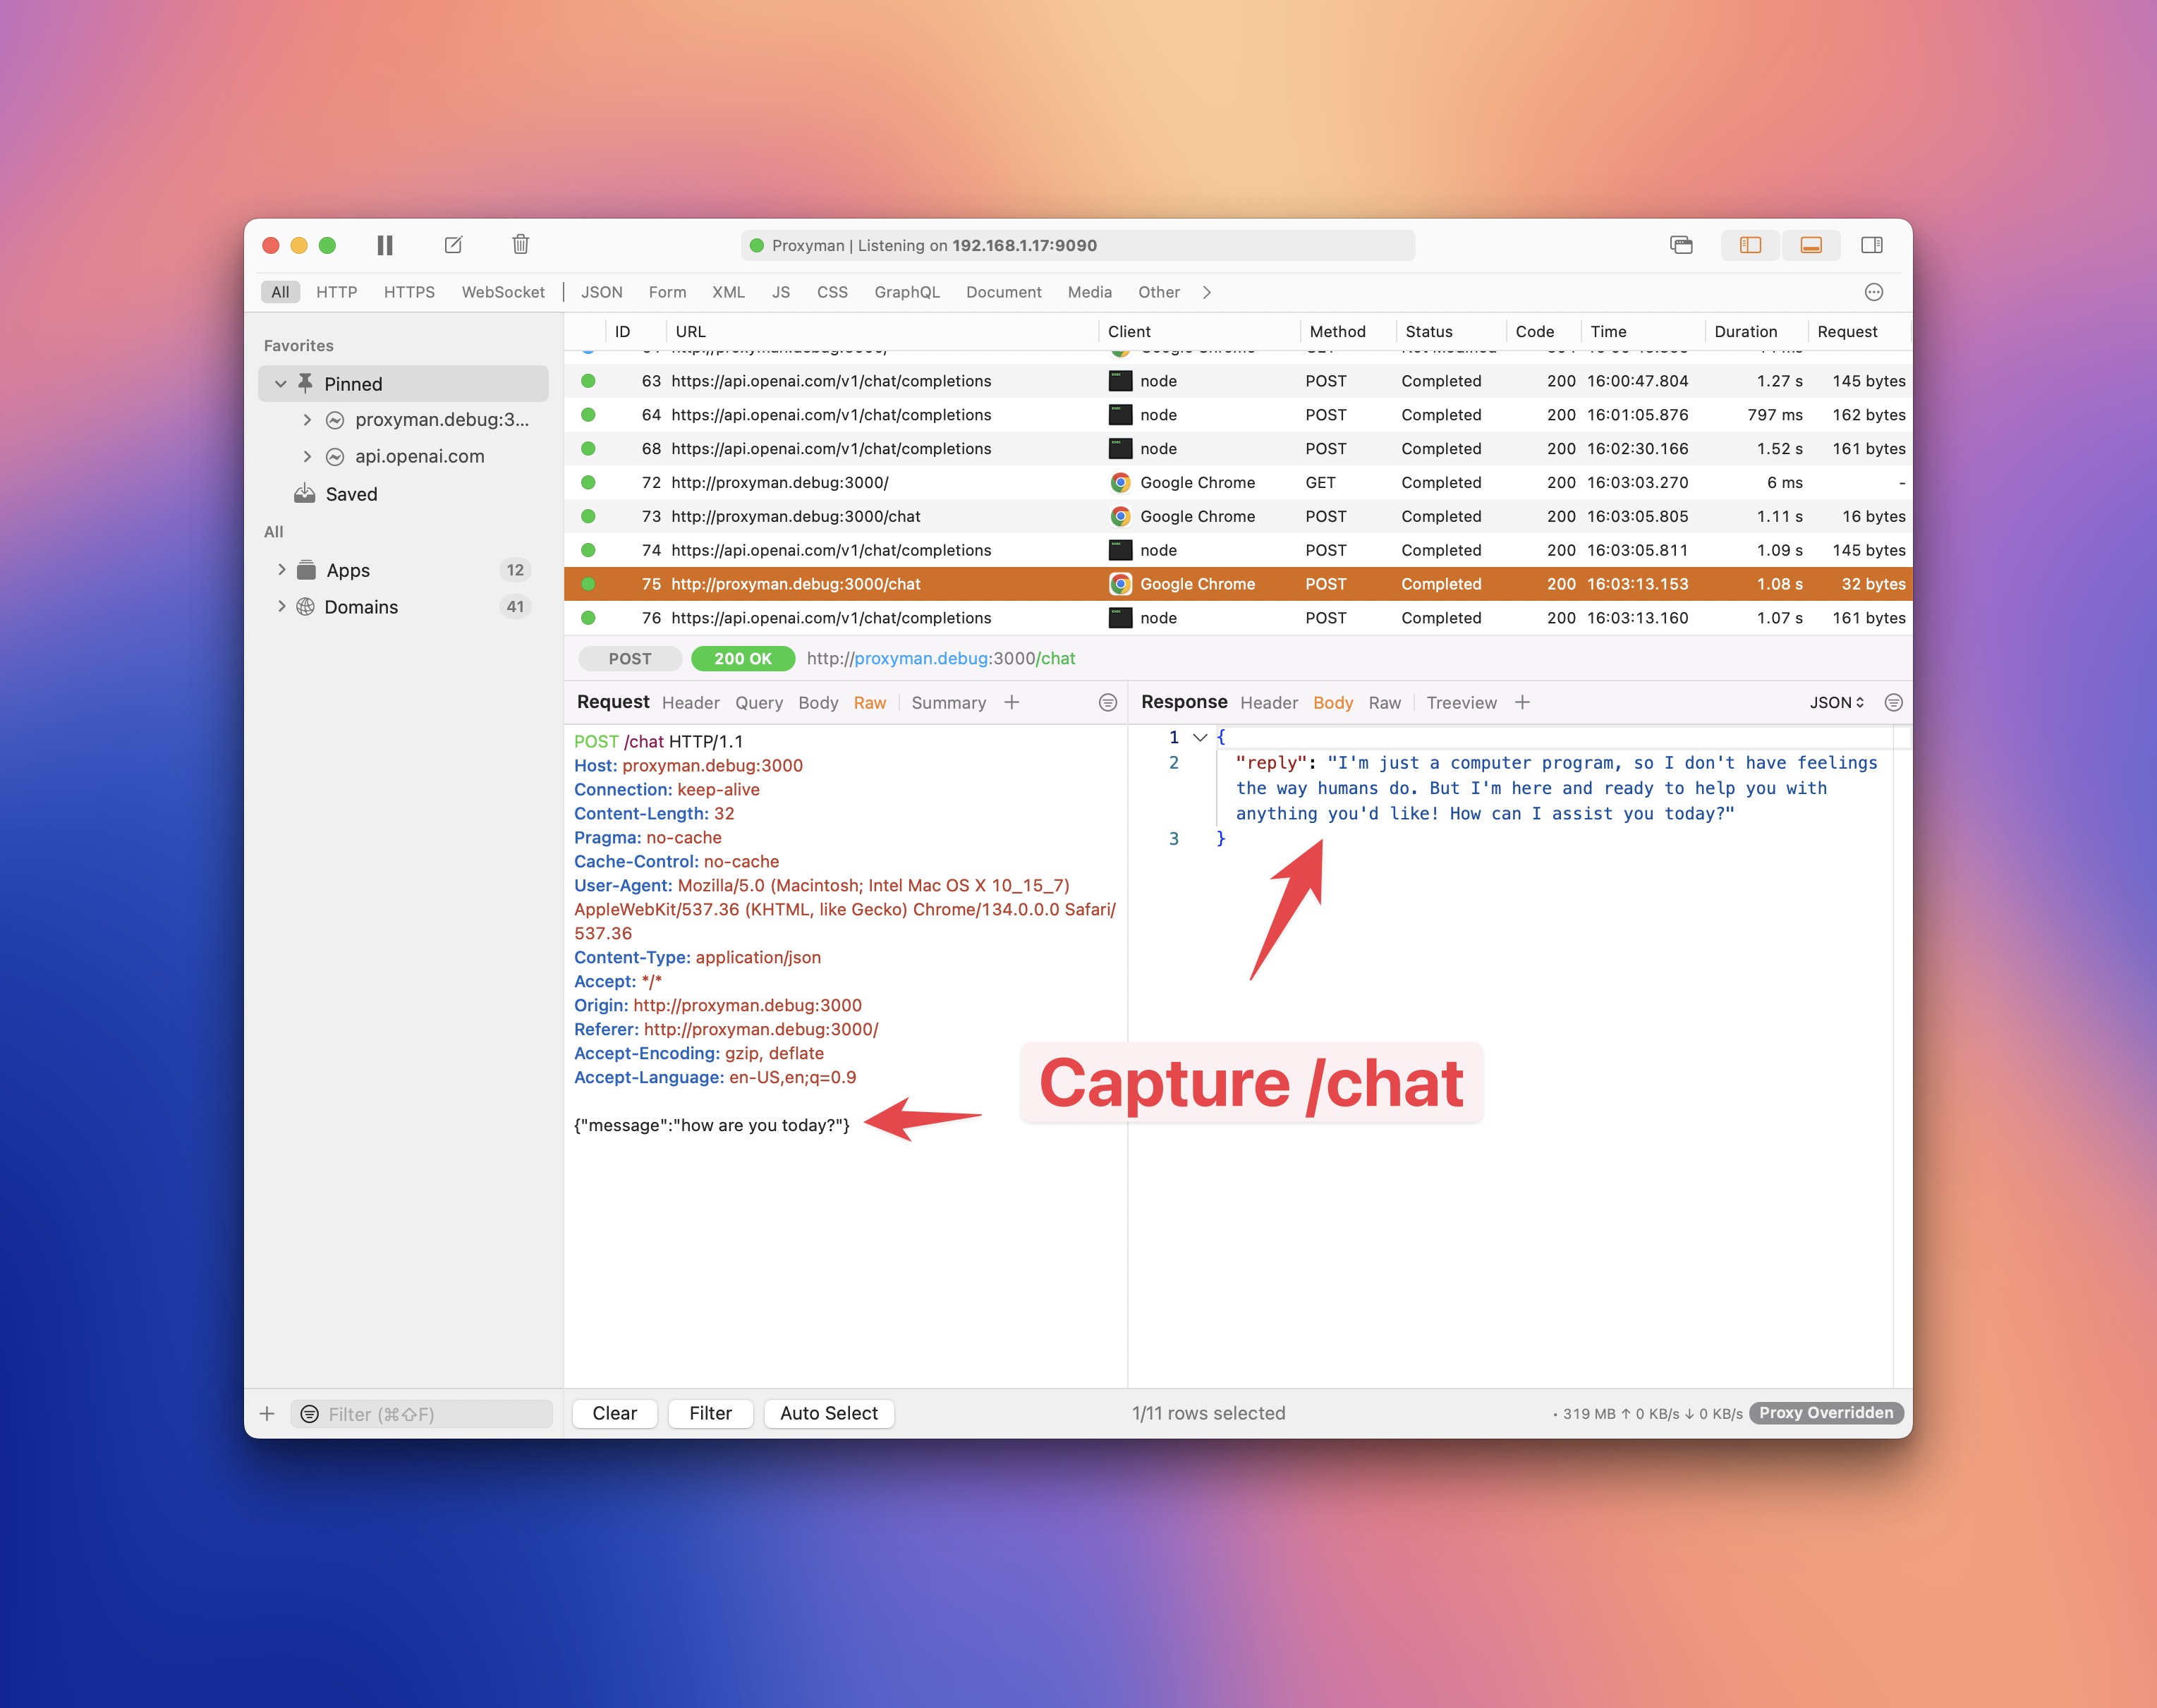
2. I want to see /chat request details from the Chat Client.
Answer:
When accessing localhost:3000 and make a few chat, Proxyman can't capture localhost:3000 traffic out of the box. The reason behind is that all localhost traffic doesn't go through the proxy. It's how macOS System works.
To fix this, we need to map localhost to the domain name in etc/hosts file.
sudo vim /etc/hosts
Add the following line to the file:
127.0.0.1 proxyman.debug
::1 proxyman.debug
You can change proxyman.debug to any domain name you want.
Save the file and exit.
Now, open Google Chrome and visit http://proxyman.debug:3000, make some chats and you will see the /chat request details from the Chat Client.
Read more at I could not see any requests from my localhost server
4. What's next?
This tutorial demontrate how to use Automatic Setup to capture HTTP/HTTPS traffic from NodeJS Server to OpenAI. It's useful when you want to debug what's happening behind the scene when you use OpenAPI.
Automatic Setup is also working with:
- NodeJS
- Python
- Ruby
- PHP
- Go
If you have any questions, please check out the Proxyman Documentation.
Proxyman is a high-performance macOS/Windows/Linux app, which enables developers to capture HTTPs traffic on iOS device, iOS Simulator and Android devices.
Get it at https://proxyman.com