Capture HTTP Request from Server Side on NextJS
1. Problems
When calling an HTTP/HTTPS Request from the server-side NextJS by using fetch(), it's really difficult to debug the network. The workaround is using the console.log() to print out the Request/Response on the Terminal app.
Therefore, it's a nightmare when debugging a large codebase with hundreds of requests.
This blog will cover the following:
- How to capture HTTP/HTTPS Request from Server Side on NextJS 15 with Proxyman
2. Solution
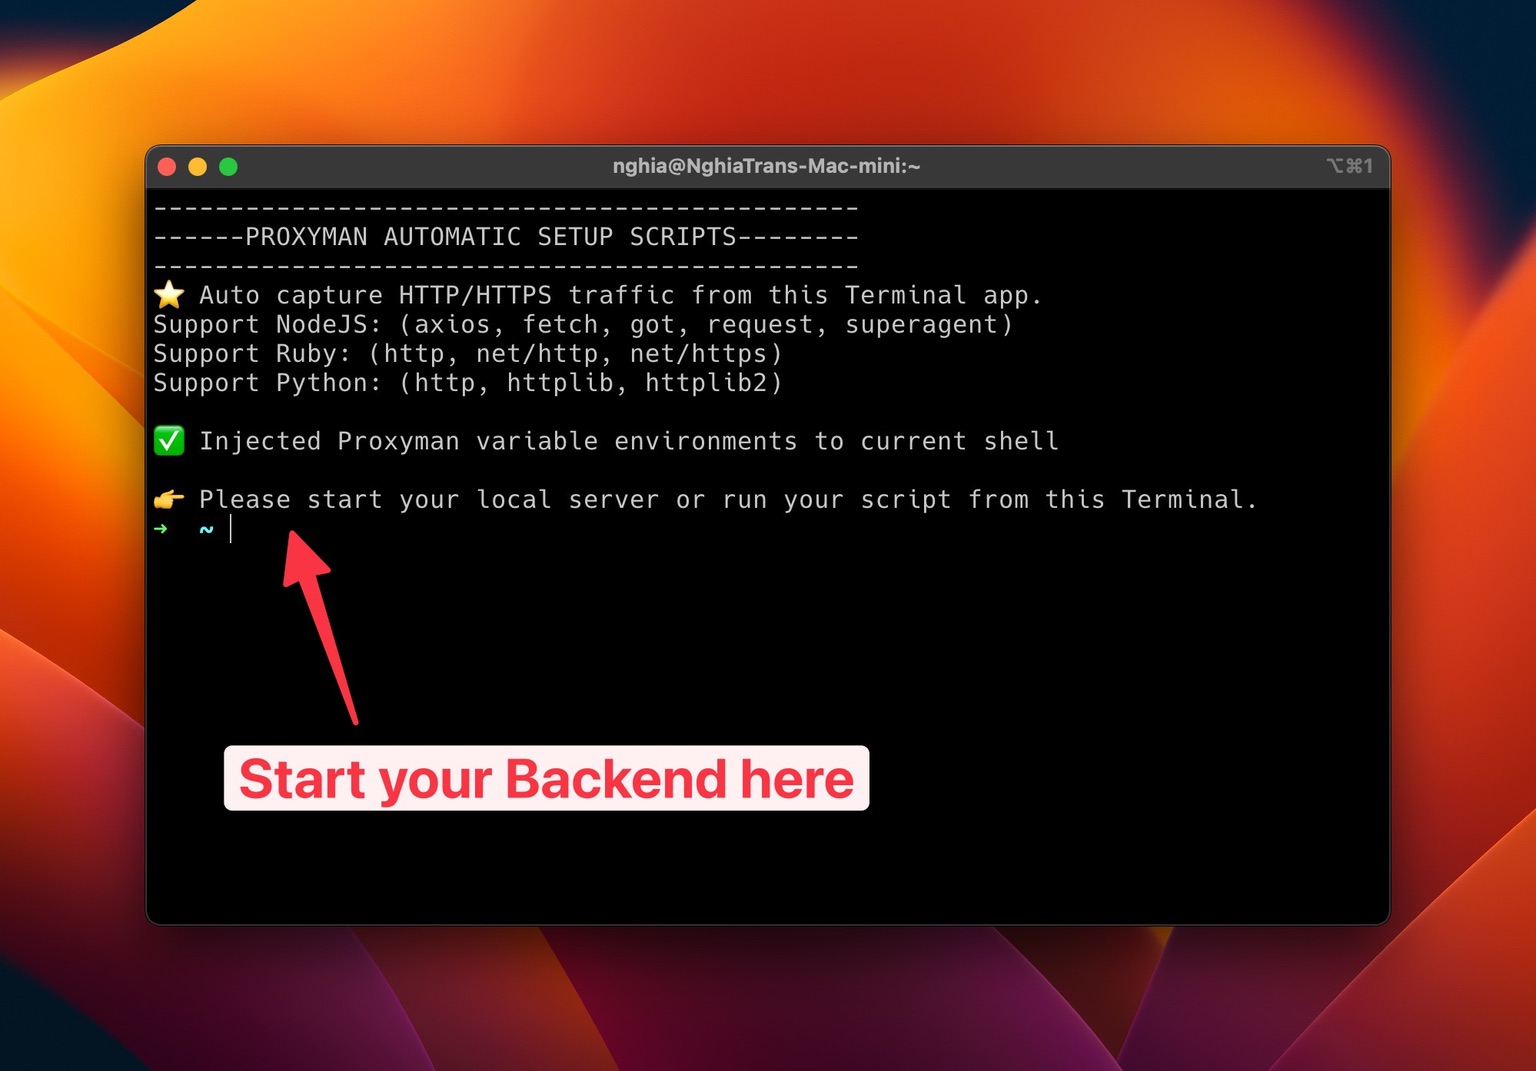
Proxyman introduces the Automatic Setup that opens the pre-configured Terminal app. By starting your NextJS Server on this Terminal, Proxyman automatically captures all HTTP/HTTPS from your NextJS Project.
Benefits:
- No need to config the proxy
- No need to trust the Proxyman Certificate
- Work out of the box
- Easier to set up than using the Reverse Proxy Tool
Here is the walkthrough:
- Tell
fetch()APIs to not use the built-in caching by using the flagno-cache
export default async function MyPage() {
  const res = await fetch('https://httpbin.org/anything', { cache: 'no-cache' }) // no cache, or no request is sent to Proxyman
  return <div>My Page{res.text()}</div>
}
=> fetch() from NextJS uses Cache by default, so sequential requests are never hit to the server. Therefore, no requests are captured by Proxyman.
=> { cache: 'no-cache' } will make sure the NextJS will always call the Endpoint.
- Open Proxyman -> Setup -> Automatic Setup -> Open new Terminal

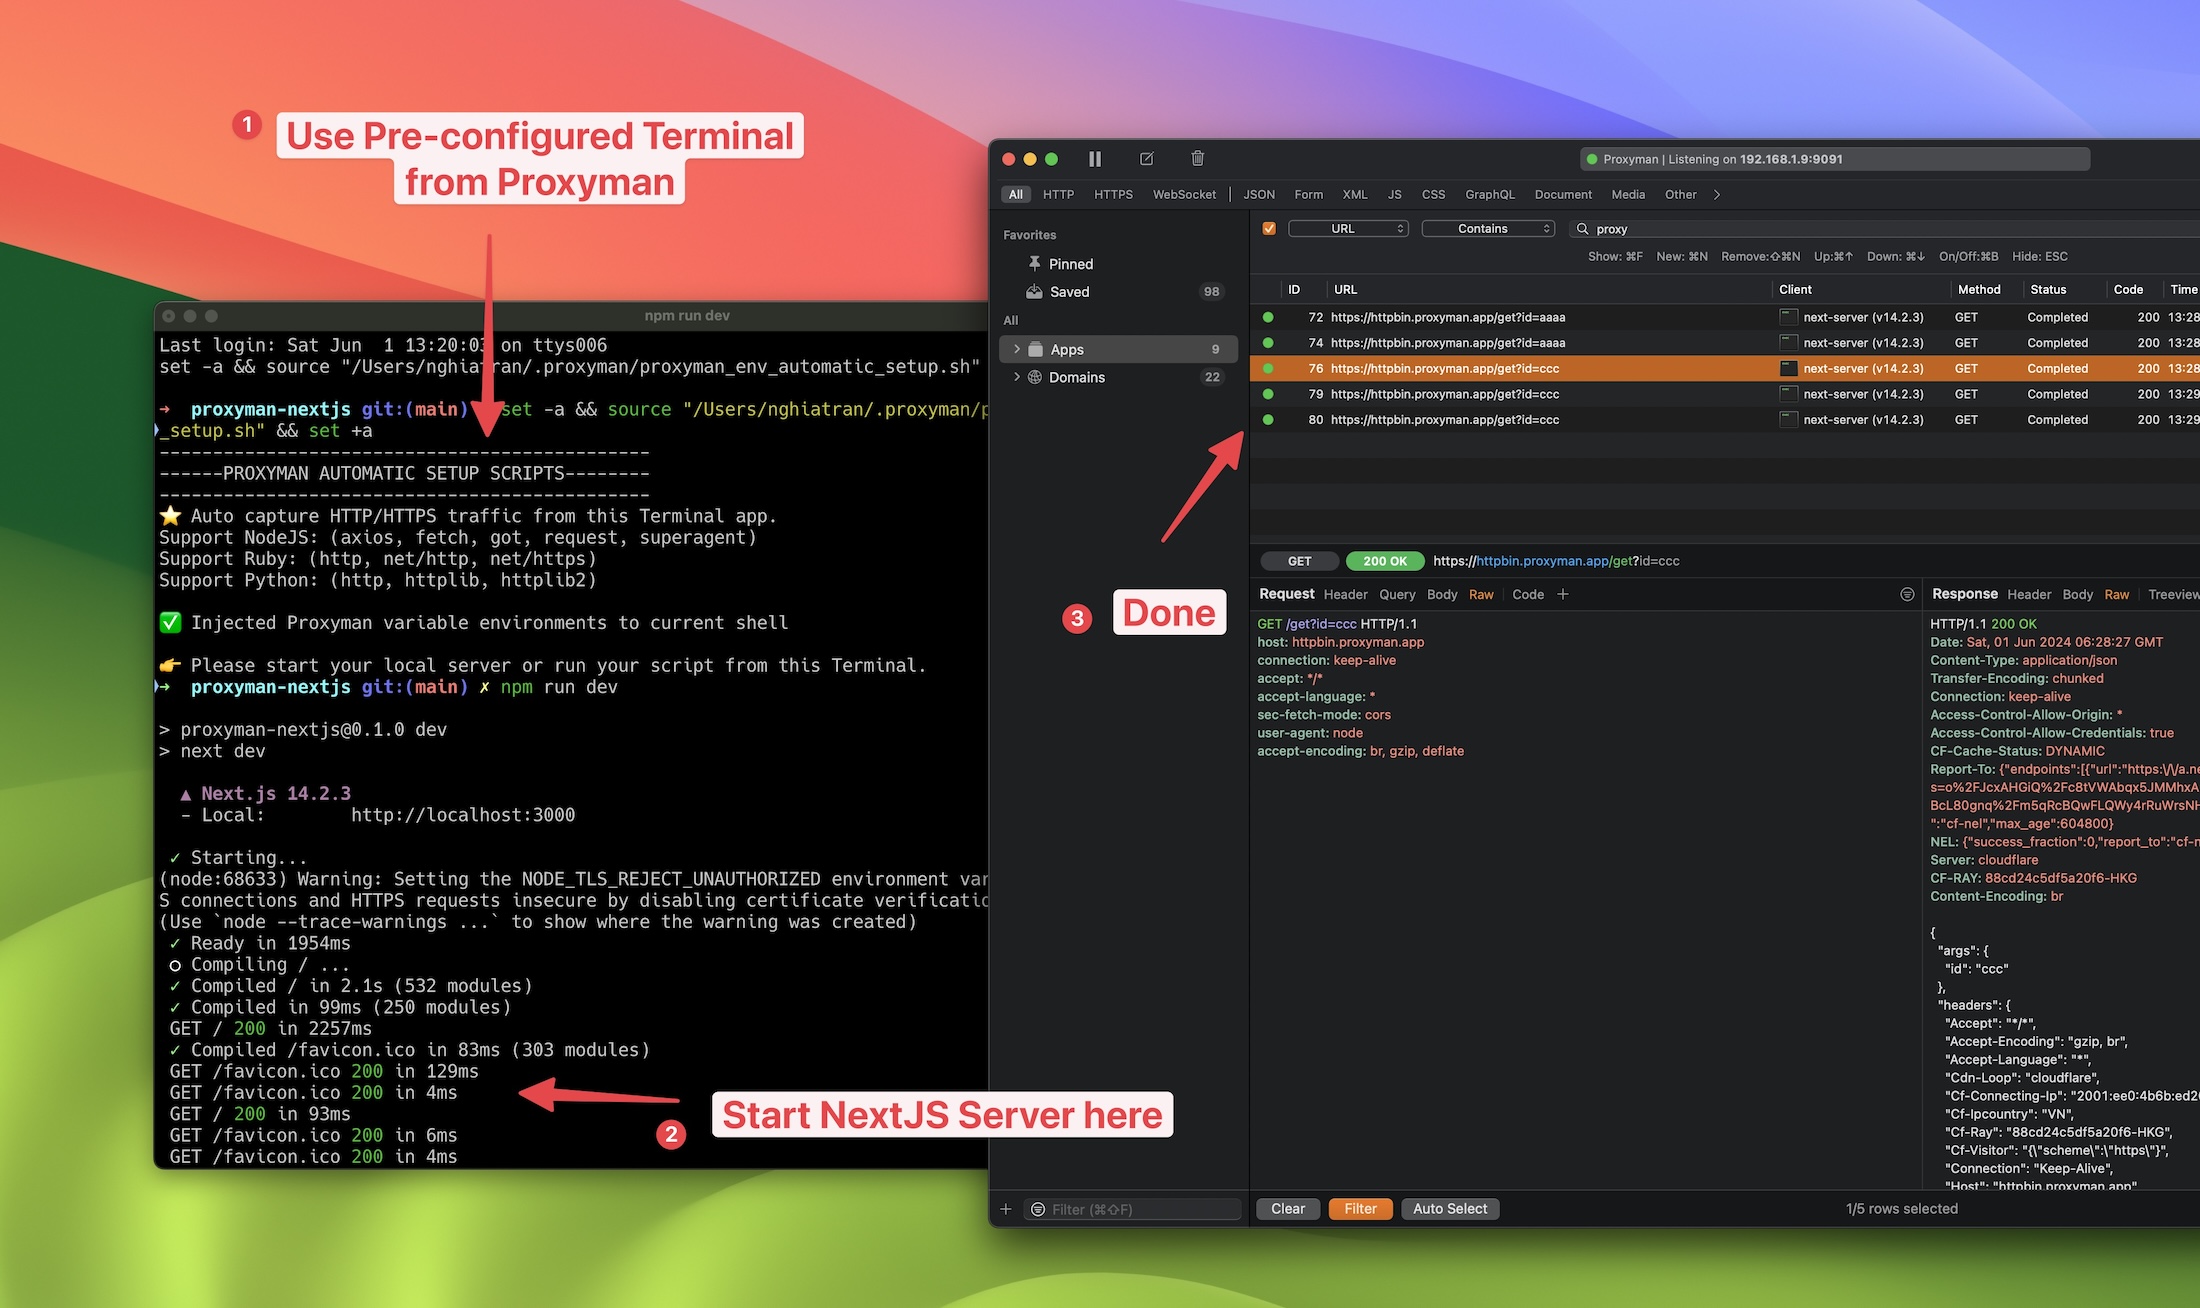
- From this Terminal -> Start your NextJS here with
npm run dev
- Done, all HTTP/HTTPS from
fetch()are captured and intercepted by Proxyman.
3. What's next
- If you prefer using your own Terminal app, you can use the Manual Setup. Let's follow these Documents to know how to set up: https://docs.proxyman.com/automatic-setup/manual-setup
- Automatic/Manual Setup Tool works with NodeJS, Python, and Ruby.